I thought I'd finally get round to trying out Neil Thomas's Wargaming Nineteenth Century Europe rules and give my cuties an outing to a battlefield. I set up a typical piece of coutryside and rolled up two random armies, using the table in his One Hour Wargames for six unit armies and rolling on it twice for each side.
I decided on the early part of the period, so both sides have close order infantry with rifled muskets and the artillery is smoothbore. All units are average except guard infantry, hussars and cuirassiers who are all elite.
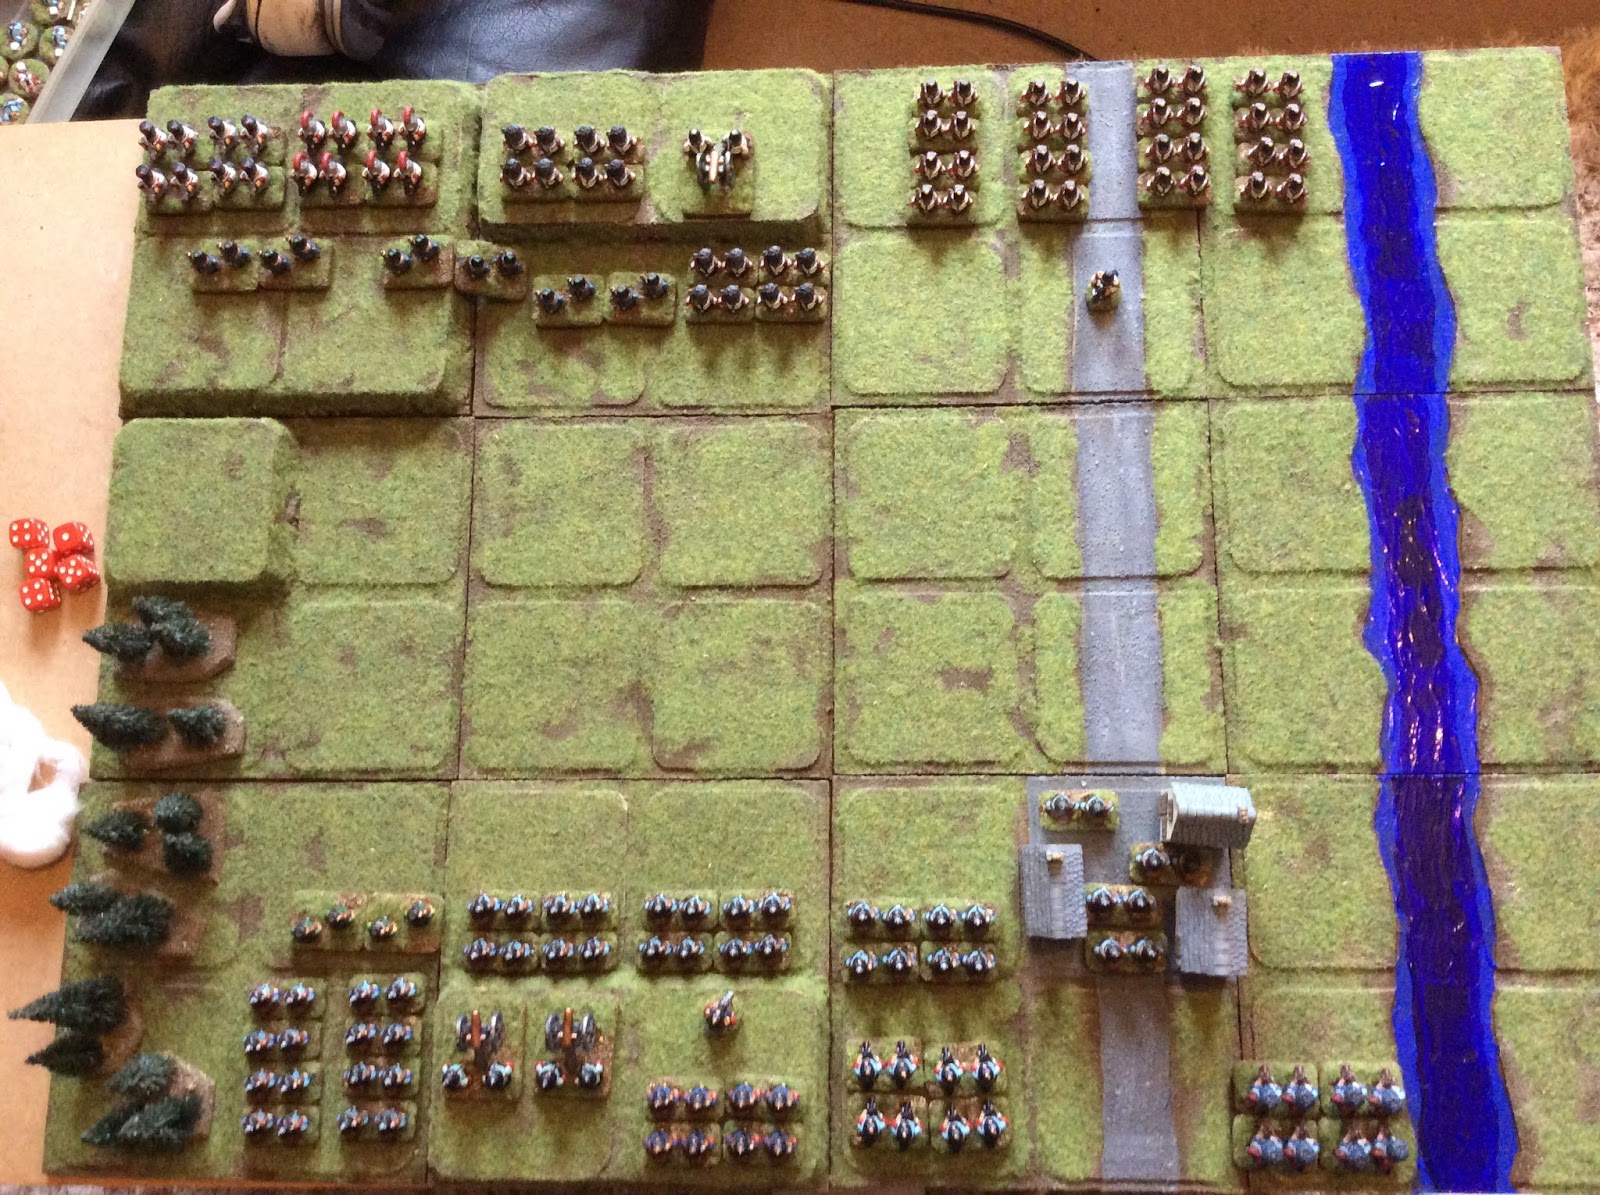
The armies deployed for battle. The square grid has no effect on play, though it might be fun to try converting these rules to a grid at some point.
GrosseKleinStadt are to the North (at the top of the picture), Bomenburst to the south.

On the Bomenburst left, two units of line in attack column screened by the army's only unit of jagers.

In the centre another two units of line to the front backed up by guards infantry and both the army's artillery units.
The general has no effect on play, but he likes to turn up for a photo opportunity.

The right flank, two line infantry, the hussars and the dragoons. These are just normal cavalry, not the special dragoon units that appear in a few army lists. I don't use any of that type, I like my cavalry to charge to contact, not dismount and fire.

The GKS right flank, and their cavalry is as far away from the oppositions as possible. These are dragoons and cuirassiers. They are preceded by grenzers (skirmish infantry for those not following my borrowed terms, same as the jagers on the other side).

The centre is held by two units of guard infantry, the lone artillery unit the army could drag to the battlefield and more grenzers.

And finally the left flank, four columns of line infantry with the Archduke prancing about in front of them like he's already won (but carefully remaining out of range of the enemy).
And so to battle. The Archduke waves his hat in the air, almost falls off his horse, recovers and the troops advance.

The left flank columns advance towards the town and the grenzers move up and start harassing fire, causing one casualty. The GKS artillery is out of range.

Bomenburst mirrors the enemy and also advances on the left with two infantry columns and the jagers. The jagers can't hit the side of a barn but the artillery gets a single hit.

The infantry columns plod onward to the town and the cavalry moves up to support the grenzers who manage to get two kills on the jagers.

One column shakes out into line while the other goes forward behind the jagers. On the right flank the hussars move up to threaten the GKS columns. Skirmish fire is again ineffective but the artillery put two hits on both the grenzers and the nearest column.

The columns move ever on, very close to the town now. The grenzers and the artillery fire to no effect, whatever is wrong with the jagers must be catching.

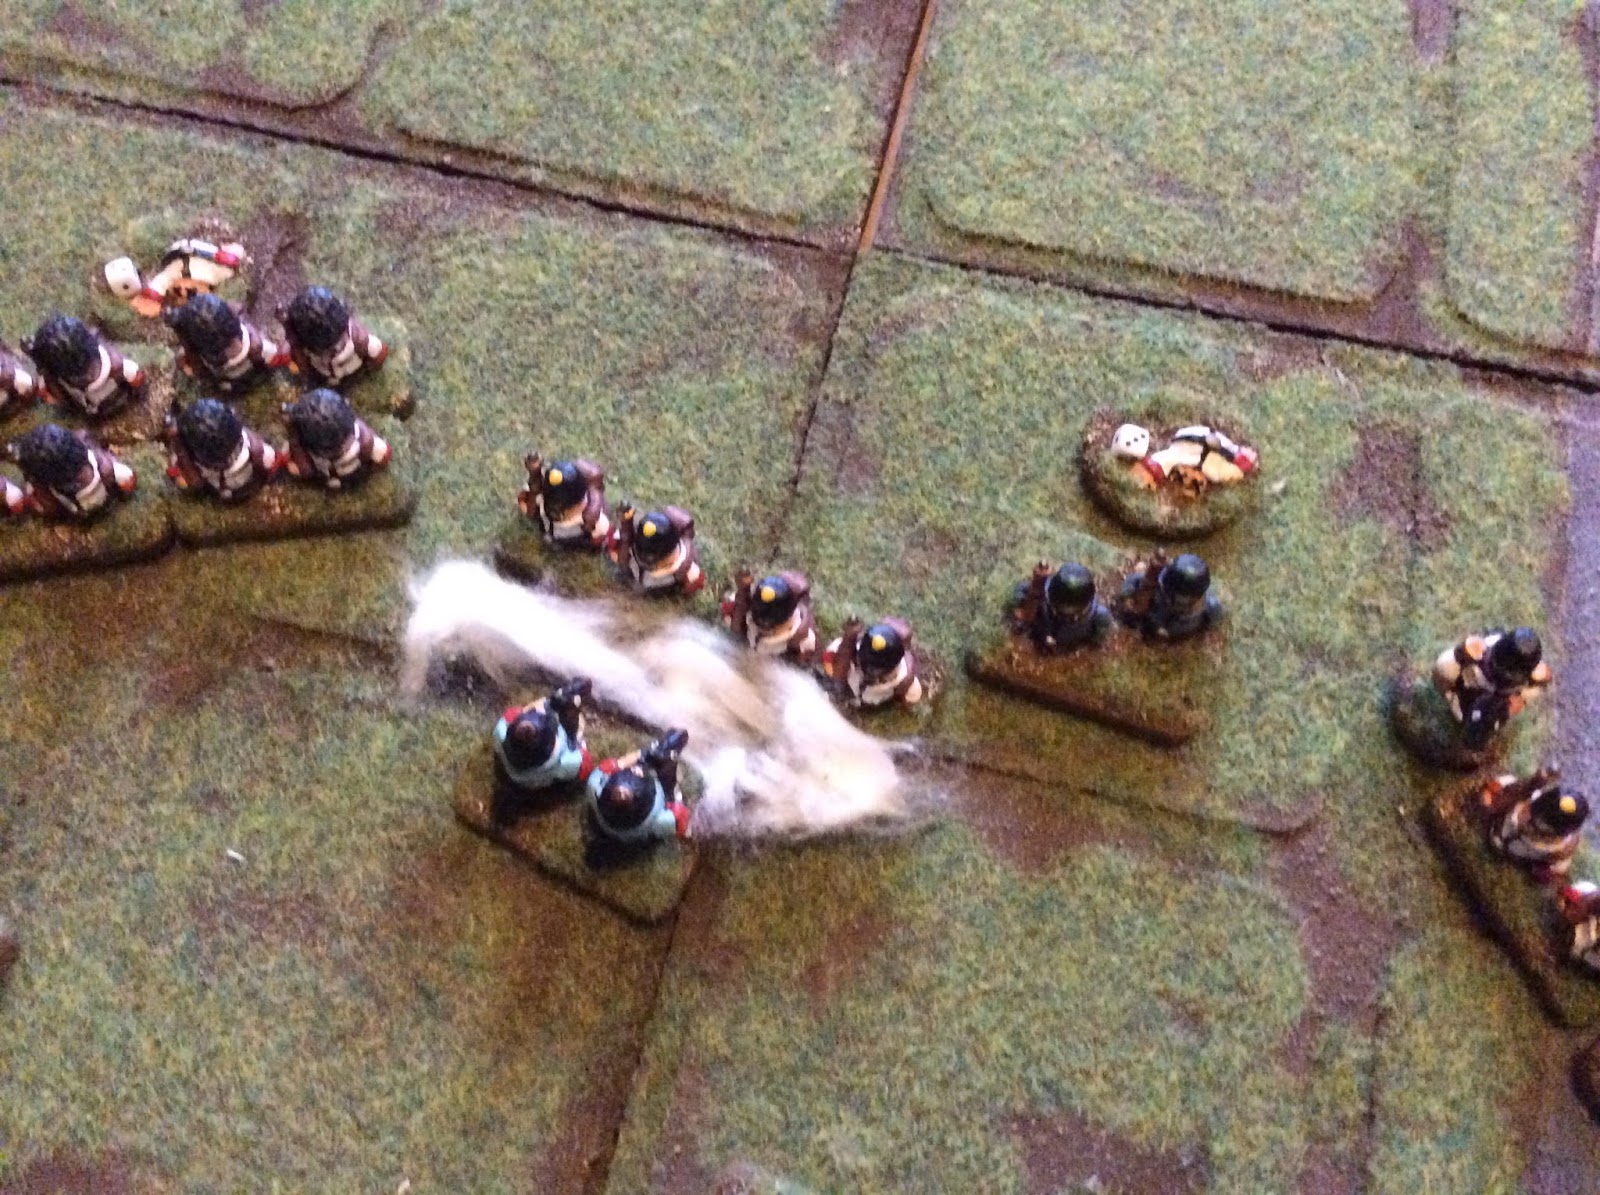
The hussars charge in...

...taking two hits from defensive fire on the way...

...and then lose the melee two hits to one! And having the first stand removed of the game, oh the shame!

Being (allegedly) elite they pass all their morale tests and fall back to try to work out where they went wrong and how to blame someone else.
(I should point out that the sequence of play has charges then normal movement and firing and finally the melee is resolved, I changed it for what I think makes a more exciting report.)

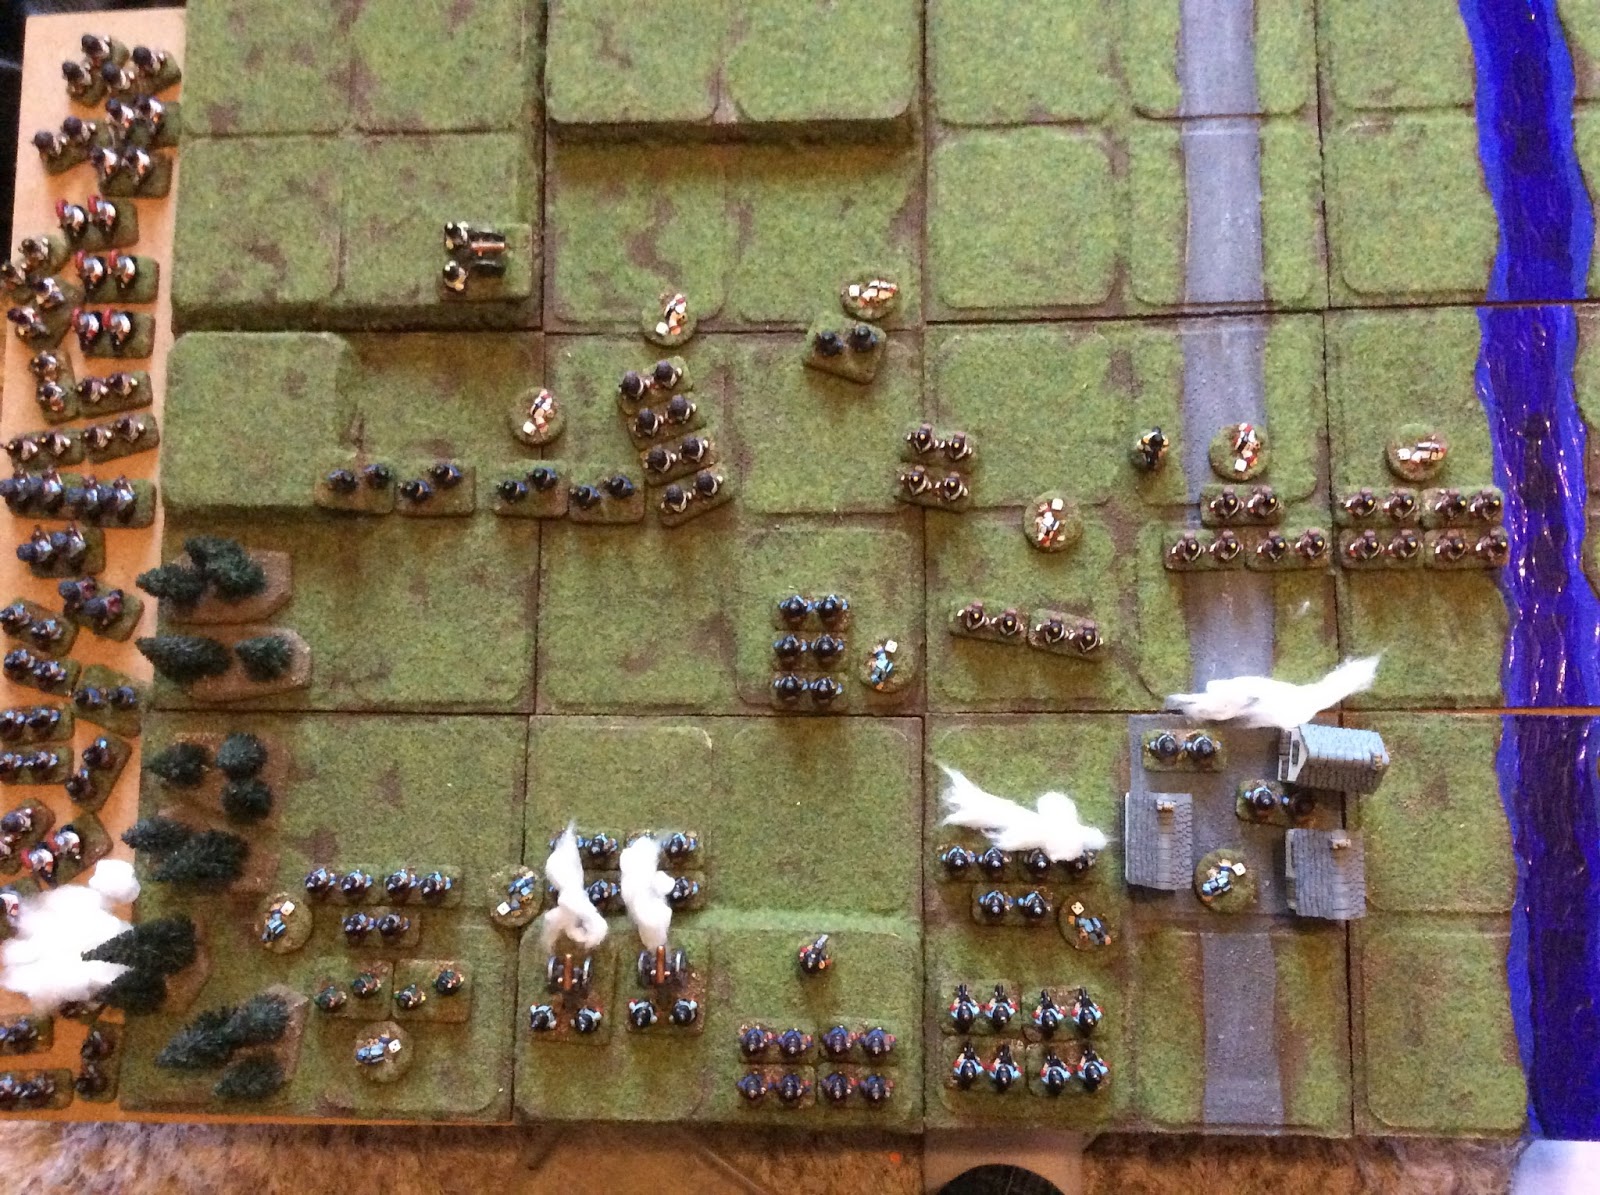
Meanwhile the remaining column on the Bomenburt left changes to line, the jagers retire though their ranks, and they open fire on the grenzers causing a hit. The Town garrison causes two hits on the column approaching along the road and the artillery puts another two hits on the nearest column which loses a base and then another as it fails it's morale check.

Unperturbed, the Archduke has three of his columns deploy into line while the third angles to bypass the town. The guard units and the artillery advance and the cavalry moves up ready to charge next turn while the grenzers move out of their way.
Firing causes a few casualties but not enough to remove any bases,
The Archduke smiles to himself, a couple more turns and victory will be mine he thinks. :)

The hussars decide the best way to hide the unfortunate outcome of their earlier charge is to repeat it and win this time. They lose one stand to defensive fire and fail a morale check which results in a single stand with one hit remaining colliding with a full strength infantry unit with only one hit on it.

And somehow they win the melee! They cause two hits and only take one in return!
Unfortunately they only had one hit remaining, and so are wiped out. The rules don't seem to cover what to do in this situation, but I decided to call it as a win for the infantry, seeing as they are the ones still alive. C'est la guerre.

Everyone else holds their ground and fires away, most significantly destroying a base of cuirassiers and causing a morale check that removes another. The infantry on the road also lose a base and the column to their right takes three hits.

And now both GKS cavalry units charge in, defensive fire knocking out another base of cuirassiers and getting three hits on the dragoons.

The cuirassiers win their melee two hits to one and the line infantry lose a base to a morale check for losing the melee.

And the dragoons inflict five hits but take four and lose a base on a morale check for the loss.

The unit facing the cuirassiers had it's retreat blocked so broke and ran, the one facing the dragoons fell back through the jagers.
Firing caused hits in the town and removed a base from the infantry unit flanking it.

Bomenburst again stands and fires along the line, wiping out the victorious horsemen and knocking a base off an approaching guards column for good measure.

The GKS forces respond in kind, their main success being in removing a base in the town and causing another one to run away after failing it's morale check.
"Not long now" thinks the Archduke.

The line unit facing the nearest guards performs a flawless formation change to column and charges them, catching them by surprise. Defensive fire costs a stand but they pass their morale check with ease and crash into their target.

The guards inflict one hit and take five in return! They fail their morale check and are gone!
The enemy infantry to their right lose a base to fire and another to a morale check. The GKS line looks very fragile all of a sudden.

Drastic times call for drastic measures, so the unit which so heroically destroyed the hussars is ordered into column and flung against the town. They lose a base to defensive fire but pass their morale check.

They win the melee three hits to two and the defenders fail their morale check and rout. They advance to occupy the town, the perfect spot for a bit of looting and a chance to lay low for a bit.

The unit who broke the guards in the centre is obliterated in a storm of fire.
"We have them on the run now lads" yells the Archduke, though no one can hear him due to the aforementioned storm of fire.

And run they do, only towards their opponents, not away from them. They lose a stand to defensive fire but press on.

Breaking them!

Bomenburst advances everywhere, but their firing is ineffective.

A hail of fire is thrown against them, and their left melts away.

The guard's attack on the town is driven off with heavy losses, the lesson being don't disturb line infantry while they are looting, it annoys them.
The cavalry are all but wiped out by defensive fire and failed morale checks.

But the survivors win the melee and force their opponents back. Firing causes some losses but it's not enough.

Bomenburst turns and flees the field.
"Well done lads" says the Archduke, "That went exactly as I planned it".
I love these rules. :)