Thursday, 29 September 2016

Mixed results.

My attempts at making 3mm figures and vehicles are going really well, with one huge problem.  The first vehicles have been cast and painted and look better than I'd hoped.  The first figure is sitting in it's mould waiting for it to harden so I can open it and cast from it.  I have high hopes for how he's going to turn out too.

But...

They won't go together.  My vehicles would be fine with normal 3mm figures.  But cuties have extra bulk and outsized helmets.  So a 3mm egg gives a figure that would go better with 6mm or even 10mm vehicles.  To go with a 3mm vehicle I need to start with an egg that's under 2mm, so the 3mm vehicles I've made will either be for a vehicle only war or I will buy some proper 3mm figures to go with them.  If the infantryman I made turns out to my liking then I'll make some larger vehicles to go with him.

Anyway, pictures of the tank and armed hovercraft I made. :)


Wednesday, 28 September 2016

Clangers

Yep, Clangers.  With guns.  To fight Daleks.


The Clangers are going to help the Zzlugg fight their Dalek oppressors.


I'm planning for a force of fourteen Clangers and a support droid, still to be made.


Four are from moulds, the fifth is a one off model.


This is the one off, Captain BayKah, one eyed one eared war hero.


Clanger with blast pistol.


Clanger with blast rifle.


Blast rifle, pose two.


And finally a Clanger with a heavy blaster.

These turned out better than I could have hoped, maybe I'm getting better at this? :)

Tuesday, 27 September 2016

The Butterfly Effect

I seem to find it hard to stick to one project, some new idea for what I could do keeps popping into my head and I just need to see if it's possible.  The Wargames Website is particularly guilty of inspiring new ideas.  This isn't necessarily a bad thing, but I may just have taken a step too far...


On the left is one of my 15mm figures, on the right a roughly 3mm egg which is possibly going to become a near future infantryman.  And I'm going to do vehicles to go with him.  Or so I hope.

For the record, here's what I'm actively working on:

19th Century imaginations
Ancient Sumerians
Zulu War
Colonial Sudan
Medieval
Zombies
Sci-fi
Prehistoric
And now 3mm Near Future

On the bright side, I'm never bored. :)

Monday, 26 September 2016

Some real figures I painted

Several years ago I made my Mum a Rorkes Drift diorama for a birthday present - Zulu is one of her favourite films.  I borrowed it off her today to take some pictures to show that I can paint real wargames figures when I want to. :p

The figures are 10mm, from Pendraken if I remember correctly.


I hadn't seen it for a few years, I'm quite impressed with how good it still looks to me. :)

Sunday, 25 September 2016

More sci-fi stuff

I completed more terrain tiles, an alien building and the first of my Zzlugg, an alien race suffering under Dalek occupation.


I'll only use four terrain tiles for a game, but it's best to have more to allow for variety.


I tried to go for something different with the building shape.


The cylinder sticking up from the roof is some kind of electronics thing, not there just so I have some way of lifting the roof off, honest. :p


A look inside.  I might add some loose furniture, but it's not a priority for now.


The Zzlugg for the most part do not fight the Daleks, but what is that behind the shrooms in the top left of the picture?


A member of the resistance!

Friday, 23 September 2016

Landing pad and scout craft

I completed the landing pad tile and something to go on it, the scout craft is really just scenery as I have no plans of having airpower in the game.  


The landing pad is a section of foam tile turned upside down, a hole the same size was cut out of the tile used for the base and the upside down section glued in place.


The scout craft is made from a sweetener container, the cybermen are to show the scale.  And because I really like my cybermen figures. :)

Thursday, 22 September 2016

Second attempt at an alien planet

Here's a step by step look at how I made my alien planet tile.


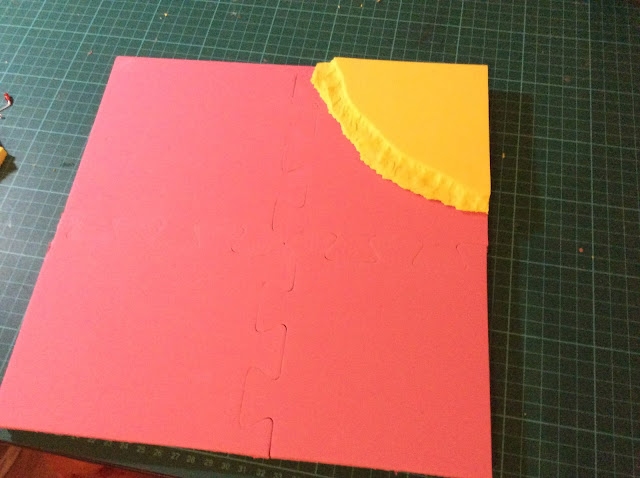
First I cut a 27.5cm sqare from 6mm MDF.


Then I cut the foam floor tile into four pieces.  These don't have to be the same size, what's important is that the cuts cross at right angles.


I then reassembled the foam tile with the teeth in the middle and glued it onto the MDF square.


A second MDF square was placed on top to keep it flat and then this was weighted down with books and left to dry overnight.


A section was cut from another foam tile and glued to the corner.


And then a smaller section cut and glued on top.  I made both sides of each level the same length to allow these to join up with other hill sections.


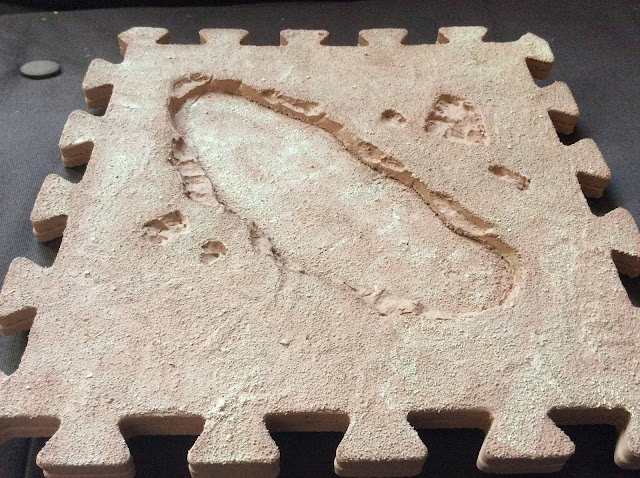
I then covered over the teeth of the foam mat with filler and gouged out some rocky depressions in the bottom right corner.  


A couple of coats of paint cover up the tile colour.


Sand was then glued on, leaving the parts I want to appear as rocks clear.


Another coat of paint, left overnight to dry because the sand really slows down the drying time.


Drybrushing over the sand to bring out the texture.


Base coat for the rocky bits.


Then they are drybrushed too, and the tile is complete. 


Add some alien plants and a few Daleks and it's ready to use. :)

Sunday, 18 September 2016

Sometimes things don't work out

I decided to make terrain boards for an alien planet, using interlocking foam floor tiles.  These are cheap and easy to cut, seemed like a great material to use.


I cut a crater out of one and also made some smaller rocky depressions, then stuck it on top of another tile.  All good so far.


A couple of coats of paint later, I'm liking the look of it.


Sand gets glued on to add texture.  I'm really liking it, I have visions of dozens of these tiles, with mountains and rivers and anything else I can think up.

At this point I accidentally spilled half a cup of tea over it, creating a very nice lake in the middle.  I did not take a picture of this, being otherwise engaged in mopping it up.  I left it overnight and it seemed to have dried out ok, disaster seemed to have been averted.


Another coat of paint and some drybrushing later, I'm feeling really pleased.


The rocky bits are painted and drybrushed too, and it's good to go. :)

But...

Overnight it warped.  I'm pretty sure this has nothing to do with the tea incident.  I think it must be the glue and paint pulling against the foam, which is very flexible.  I can straighten it, but it cracks when I do.  I have no faith that the jigsaw bits will survive being repeatedly joined and separated. So, this isn't how I'm going to get really nice looking terrain for my space project.

But...

I really like the foam tiles as a material to work with.  I'm going to try using an MDF board as a base and build the tiles up on it.  The jigsaw bits won't work with that, so I need to make the tiles square.  If I cut the jigsaw bits off all sides I lose 2", turning 12" squares into 10" squares.  But by cutting the tile into quarters and reassembling it with the jigsaw pieces all in the middle I only lose 1", so I can make a set of 11" squares, which is good enough for me.  

Thursday, 15 September 2016

Just My Imagi-Nation Part 8: Forces of Bombenburst

Having now painted and based at least one of each unit type in the Bomenburst  army, here's what they look like.


All sixteen units plus the general, ten more to go till it is complete.


Curassirers, only one unit of these in the army.


Dragoons, one painted, one more needed.


Hussars, the one and only unit.


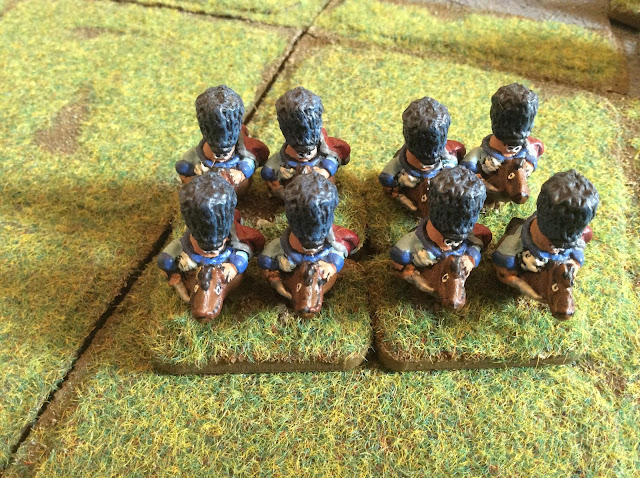
The Bomenburst Guards, both units are painted and based.


Line infantry, three done, five more to go. ~sigh~


Skirmishers.  The army has four of these, so complete.


The Artillery.  I need four with bronze guns and four with steel guns, the bronze ones are all done. No rush for the steel artillery, won't be needed for many campaign years.


The General, Frederick von Kutee.

I have decided to start the campaign without doubling the unit numbers in the scenarios, the armies in the 1848 war are much smaller than the forces later in the century.  I need to complete some more terrain tiles and then the armies shall march. :)